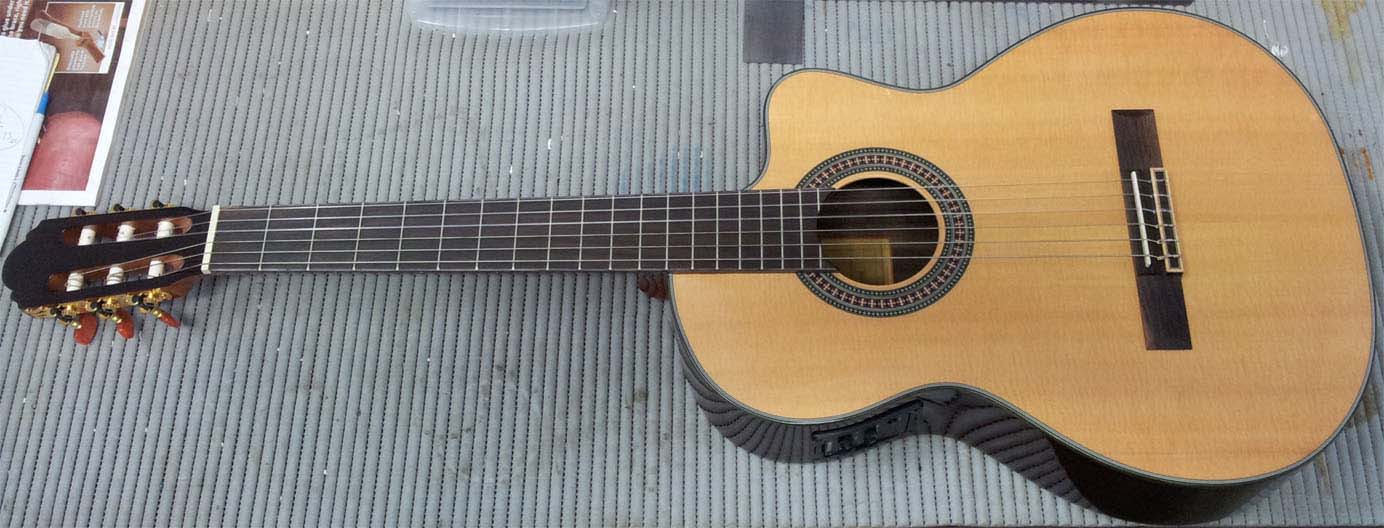
How to Change the Strings on your Nylon String Classical Guitar
Author: Artist Guitars
Learn the best way to change your Classical nylon guitar strings for optimum tuning & stability
Learn how to change strings on your Classical (nylon string) guitar like a pro! This article will show you how to do a perfect string change.
Changing Classical guitar strings is a little more complicated than changing strings on a steel string acoustic guitar or electric guitar because a nylon string guitar requires special knots and stringing techniques unique to this style of guitar.
When you change your strings be careful to keep your guitar in tune at all times, and replace one string at a time (1 by 1). Your guitar likes to be tuned, if you take off all the strings it can affect the neck.
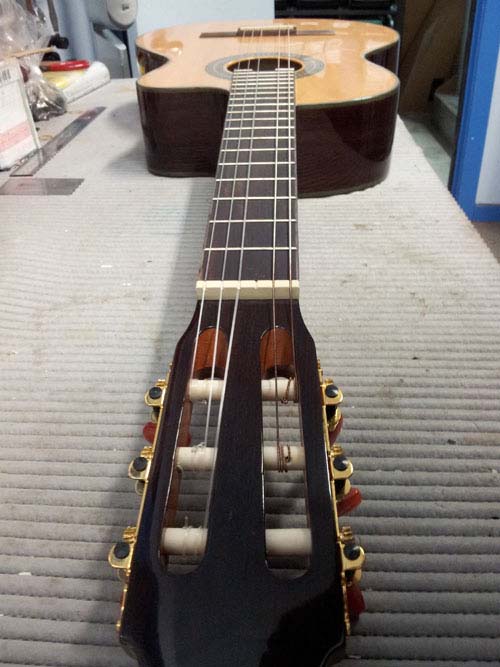
1. Lay Down the Guitar
Lay your guitar down on a nice flat surface (a desk or table is often a good place). Make sure there are no bits of debris to scratch your guitar.
2. Remove your Strings
Remove your strings one at a time. Keep loosening the machine head until the string is completely loose. When the string is loose you can just unwind from the machine head. Complete all the steps before removing the next string.
Pro tip - use a string winder, a string winder will make this step a lot easier and quicker
3. Pull Through
Now that your string is loose you can remove the string from the machine head by pulling the string through the hole.
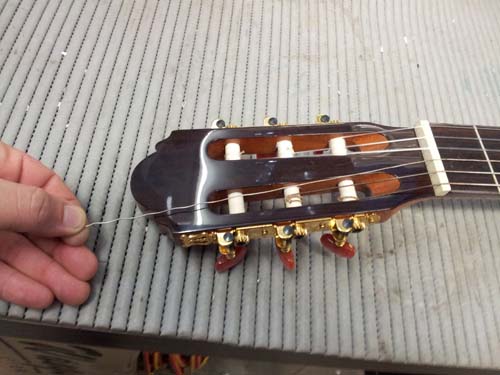
4. Free the String
Freeing the string from the machine heads, we can push it through the bridge to free it from the special knot unique to nylon string classical guitar. More on how to tie your new string in the following steps.
5. Pro Tip...
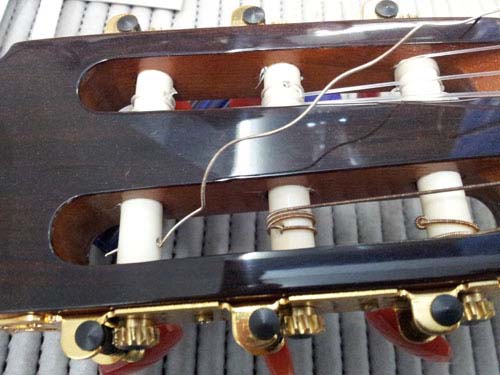
Your guitar should now look like this. Notice how the other strings remain. Never remove all the strings at once. This compromises the neck and the guitar may require a full setup which can sometimes cost over $100.
6. Insert the New String
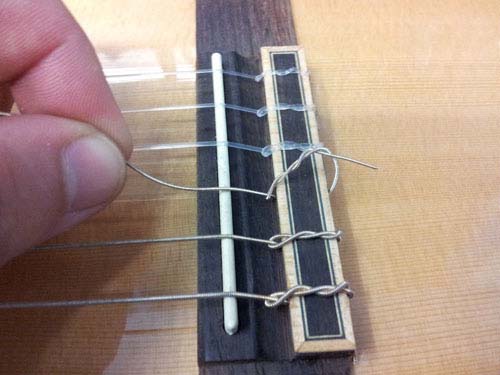
Remove your new guitar string from the packaging and feed one end into the bridge from the soundhole towards the end of the body. Feed through approximately 5-8cm. Any excess string can be trimmed later when you have completed the steps.
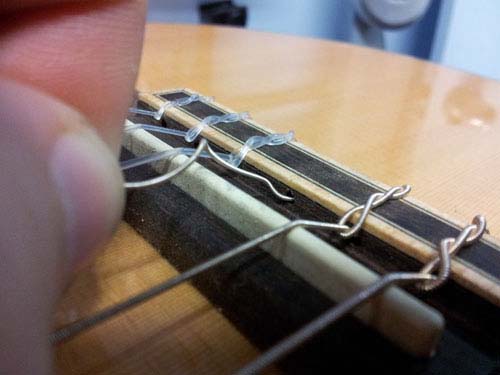
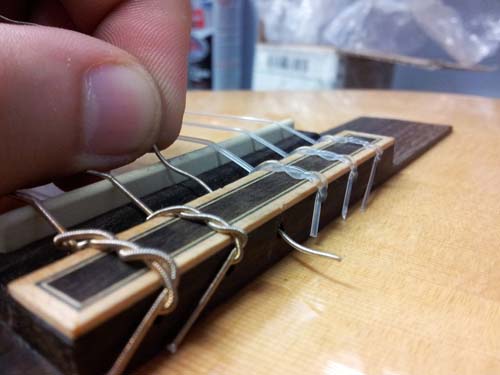
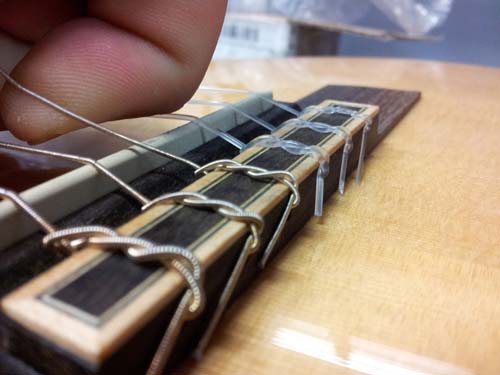
7. Bring it Over the Bridge
Once you have pulled the string through, bring it back over the bridge and curl it around the string. This is our first step of the unique classical guitar knot.

8. Twist
Twist the string over and under the section lying across the bridge of the guitar. This is the second step of your knot.
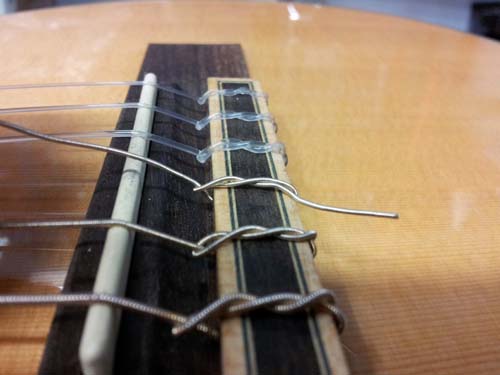
9. Twist Again
The next step is to repeat the over and under "twist" and allow the end of the string to curve over the bridge and sit on the back end of the bridge. Traditionally a nylon string classical guitar will have two "twists" in the knot allowing it to look tidy and stay as secure as possible. Ensuring the string is secure will guarantee consistent tuning.
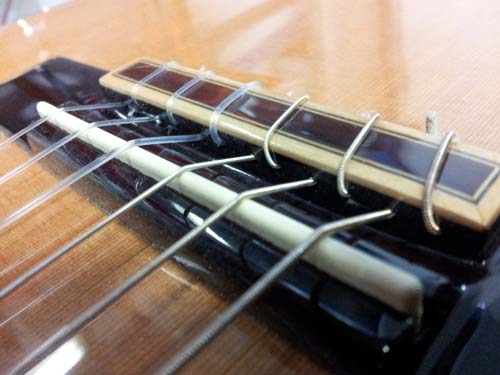
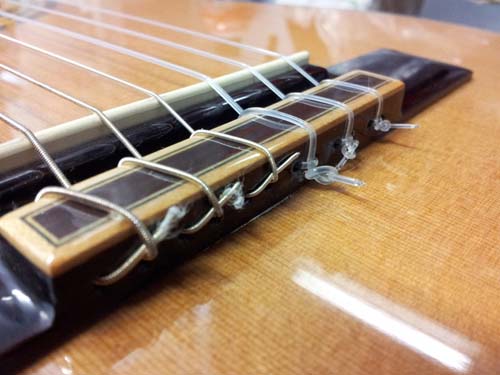
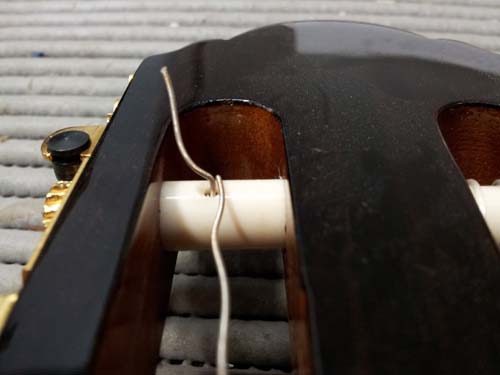
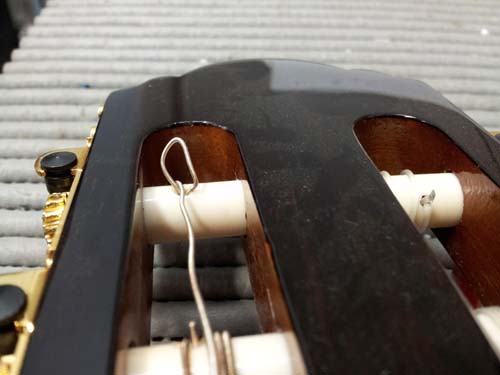
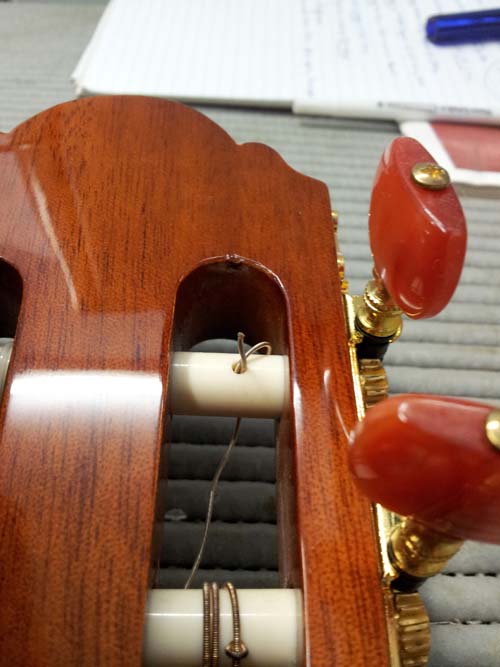
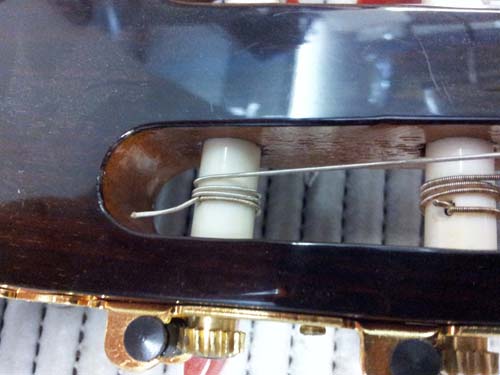
NOTE: Our higher-grade Classical guitars use an alternative string mounting arrangement which makes string changes faster and easier. The photos below illustrate how each string is fed through two separate holes to fasten the string and secure it in place.
10. Lubricate
Before the string is tuned to pitch, now is a great time to add some lubricant to the nut. The lubricant will help avoid additional wear on the nut. Helping keep the strings in tune and avoid strings getting stuck which can lead to breakages. Apply some lubricant along the string slots of the nut to lubricate the slots where the strings sit.
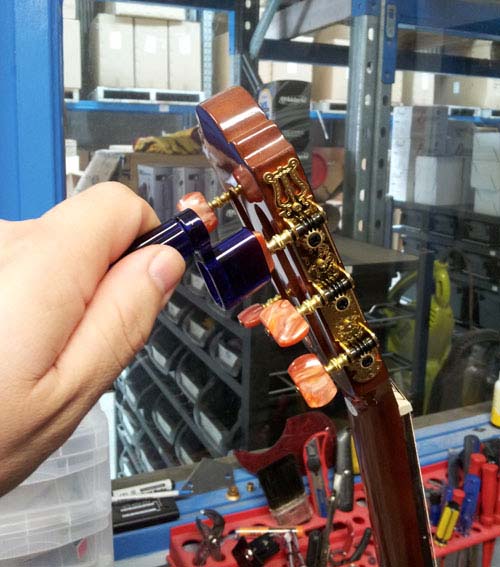
11. Wind Around the Machine Head
Now that the bridge end of the string is secure and we've lubricated the nut, we can pay attention to the other end of the string. Extend the string out to the machine heads and allow the string to stretch past the corresponding machine head by approximately 8-10cm. This will allow the string to wind around the machine head 3 to 4 times, allowing the string to "grip" and avoid slipping and going out of tune. DO NOT trim the string yet. We'll do this once we have finished changing all the strings. Not enough string length will cause it to slip and you will have to buy a new string.
12. Feed Through
Feed the end of the string through the machine head, leaving 3-4cm which we'll use in a later step.

13. Start Winding
The next step is to start winding the string around the machine head. We do this by winding the tuning peg. At this point, we only want to wind the string around once while using our other hand to hold the string to avoid losing the tension of the string around the machine head and keeping the string from slipping.
The string should now look like this.
14. Loop it Over
Now we'll take the end of the string sticking out and loop it over the string, feeding it back through the hole to help grip and lock the string in place.
This is what the underside should look like.
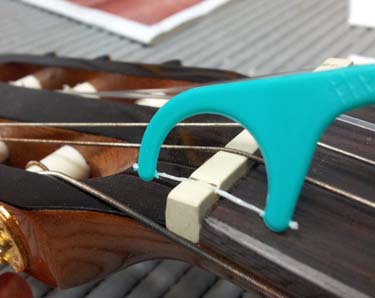
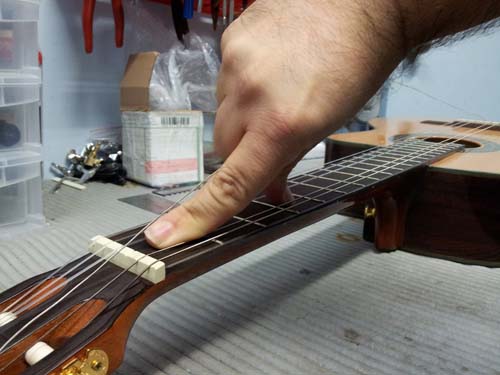
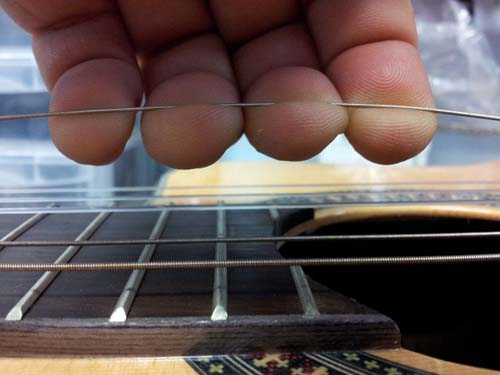
15. Tune the String
You can now begin to tune the guitar. Wind the string tightly, ensuring that your other hand is constantly holding tension on the string. Avoid letting the string run through the string slot in the nut. This will wear out the slot and cause the string to sit lower. A lower string can cause buzzing and "dead" sounds as you play the guitar. Notice in the second image how the string is held tightly avoiding contact with the nut.
16. Pitch Perfect
Once the string starts to tense up without your hand holding tension, you can begin tuning it to the correct pitch. The string is still very stretchy at the moment, so pull gently but firmly on the string to help stretch it. This will help the string stay in tune. Nylon strings are more stretchy than steel strings, so they will require more pre-stretching and will go out of tune more often over the first few days.
This is a critical step to a perfect string change. Play the note, then pull on the string, re-tune, and play the note again. Does it sound like the string is lower in pitch? If it does, you have some slack in your string and you need to re-tune it back up to pitch. Pull on the string again and test it to see if the note changes pitch at all, you might need to do this 8-10 times before the string remains within its correct pitch.
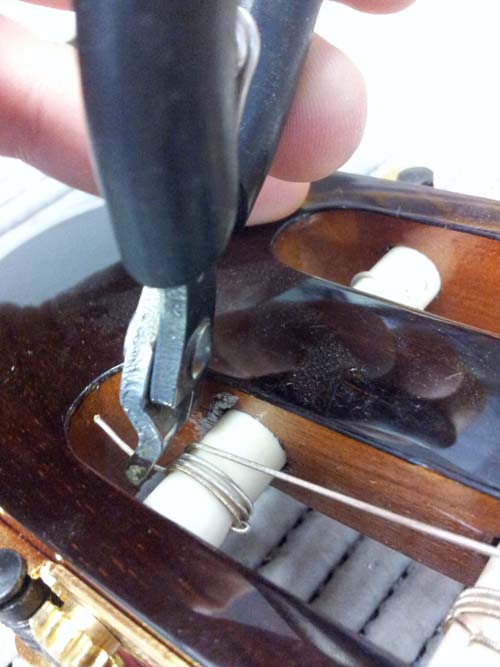
17. Trim the Excess
Trim the excess string 1cm away from the machine head for a tidy, professional look.
Congratulations! You now know how to change your strings like a professional!