Change Floating Trem strings like a Pro
Author: Artist Guitars
Change your Floating Tremolo Electric Guitar Strings like a Pro
Learn how to change your electric guitar strings on a floating tremolo-style bridge guitar like a pro. This tutorial is for your floating tremolo bridge guitars such as our AG Series. Check out how to change other styles of guitar strings here. More tutorials are added all the time. Check back to see what's new!
When you change your strings be careful to keep your guitar in tune at all times, and replace one string at a time (1 by 1). Your guitar likes to be tuned, if you take off all the strings it can affect the neck. This is especially important for a floating tremolo guitar because as one string is tensioned up to pitch, the bridge is pulled up due to the floating nature. There are many proven methods of changing strings on a floating tremolo style of guitar. Read below for the way we believe is the easiest.
1. Lay Down the Guitar
Lie your guitar down on a nice flat surface (a desk or table is often a good place). Make sure there are no bits of debris to scratch your guitar.

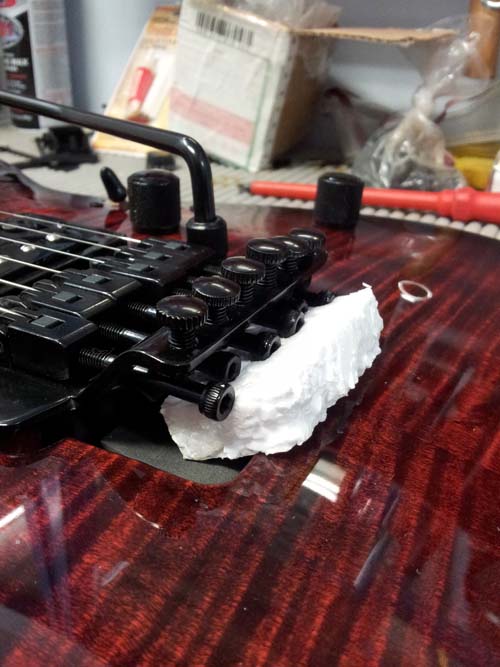
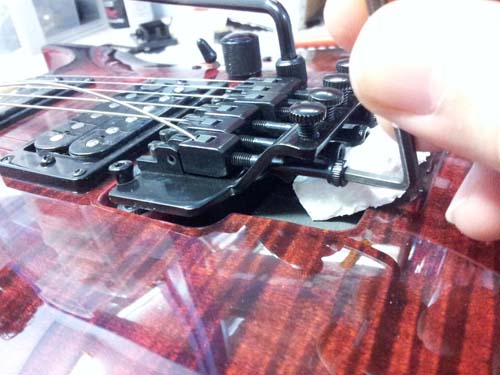
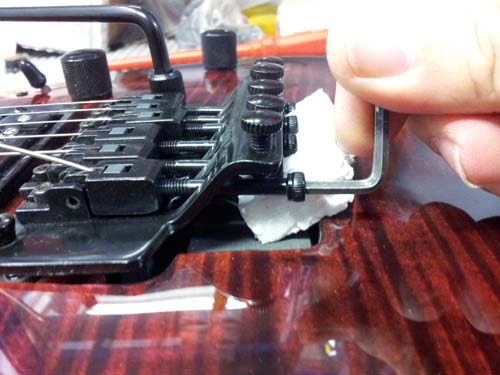
2. Secure the Floating Bridge
Place a piece of dense foam, styrofoam, or a felt-covered block of wood to fix the bridge. I used a piece of dense foam from the packaging. This will help avoid any movements of the bridge while the tension of the string is released, ensuring the bridge stays in the same position since a floating tremolo bridge can be a challenge to set up if you're inexperienced. Failing to add the block will make tuning the guitar nearly impossible for beginners due to the floating nature of the floating tremolo bridge.
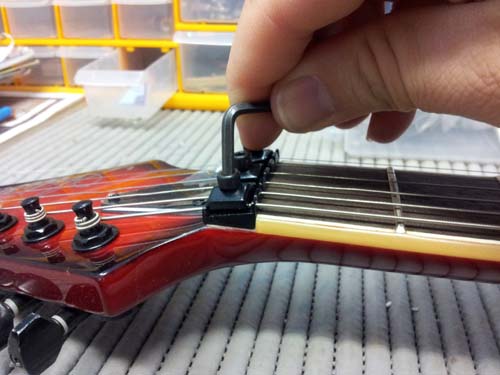
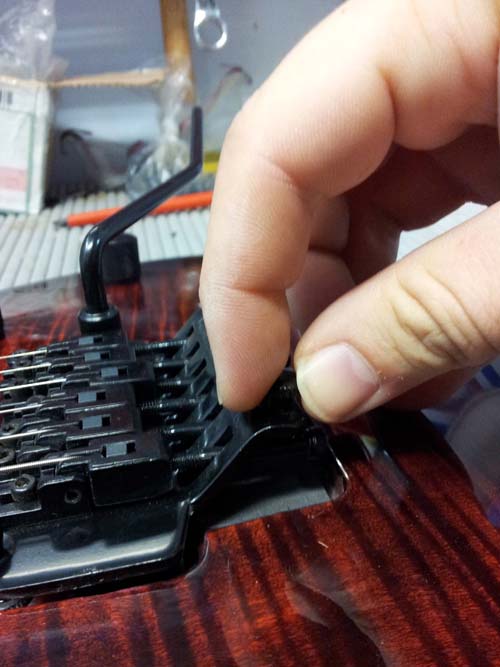
3. Unlock the Nut
Remove just one of your strings at a time (it's really important to do these one at a time, especially on a floating trem guitar). First, unlock the nut using an Allen Key. You can remove it completely to make taking the string off easier. Once we've loosened the locking nut, unwind the machine head until the string is completely loose. When the string is loose you can just remove it from the machine head. Complete all the steps in this tutorial before removing the next string. It is important to only remove and replace one string at a time.
Pro tip - Use a string winder! A string winder will make this step a lot easier and quicker
4. Remove the String
Now that your string is loose you can remove the string from the machine head by pulling the string through the hole.
5. Unlock the Trem Locking Nut for the String
Once the string is released from the machine head, we can begin removing it from the floating tremolo bridge. Using your Allen Key, undo the trem locking nut for only the string we're replacing. The end of the string will then easily slide out from the bridge. Once removed, notice how the string doesn't have a ball on the end. The new string will. We'll cut the ball end off the new string before we fit it into the tremolo bridge.
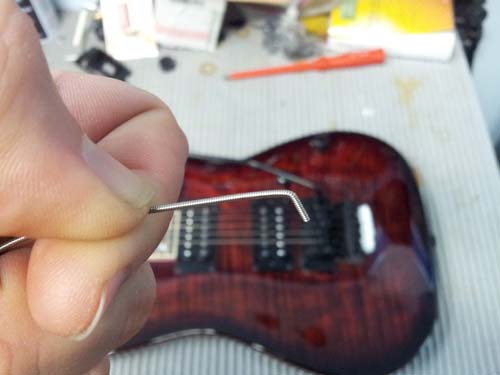
6. Prepare the New String and Insert into the Trem
Take the new string and snip off the ball end using some side-cutters, then add a slight bend to the string about 10mm from the end. This will make the string fit easily into the locking tremolo and sit perfectly in the saddle. Make sure the string is sitting all the way in the saddle and fits into the slot. Poor fitting will increase the chances of the string slipping out once under tension when tuned. Don't bend the string too much, as this will weaken the string and cause premature breakage.
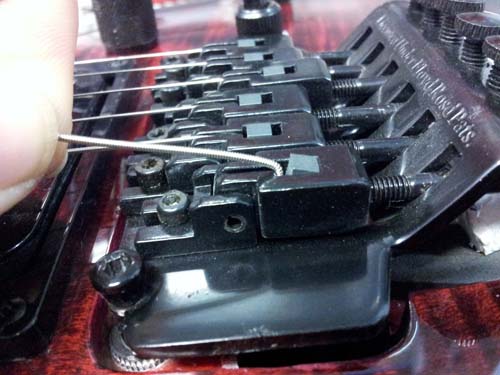
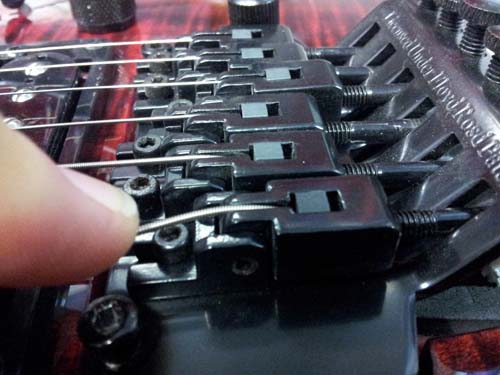
7. Tighten the Saddle
Tighten the saddle lock using your Allen Key so the string is secure. DO NOT over-tighten. The lock should be firm, but overtightening can break the locking mechanism.
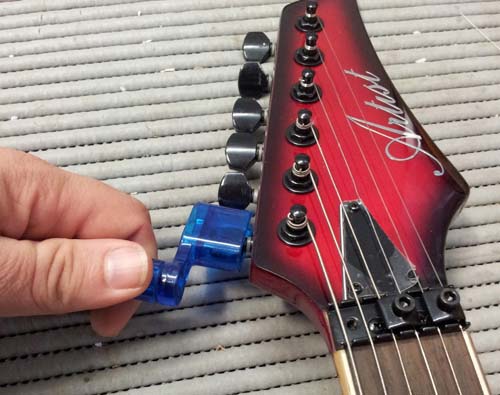
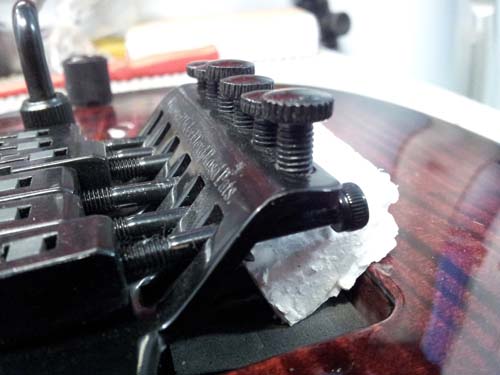
8. Unwind the Fine Tuners
Before fitting the other end of the string into the machine heads, unwind the Fine Tuning nuts on the top of the floating tremolo. We will use these to fine-tune the strings once the nut is locked in place. Unwind the nut until it's completely lose. Then wind it back in until you feel tension on the fine-tuning nut. Once you feel some tension, wind it in 1 full turn. This will allow us to fine-tune the string up or down in pitch later on, allowing for stretching after we've pre-stretched the string once it's fitted.
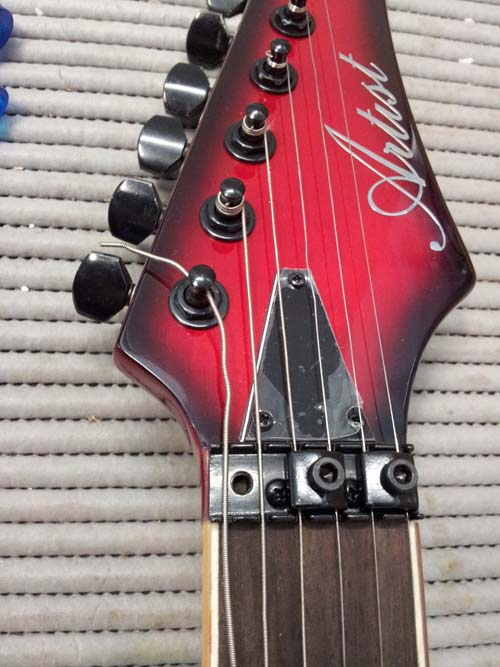
9. Extend the String and Feed Through the Machine Head
Extend the string out to the machine head and feed it through the hole in the machine head. Grab your string winder and tension up the string. As you wind up the string, make sure to lift the string away from the nut. The string sliding through the nut can cause it to wear out and make the string sit lower. This can cause unwanted buzzing and worse, string muting. The nut will need replacement and the guitar will require a complete setup by an expert guitar technician. This can cost over $200 for a floating tremolo guitar.
10. Tune the String Slightly Flat
Once the string is tuned close to pitch we want to avoid tuning the guitar to pitch just yet. Some techniques suggest tuning the string sharp. So instead of tuning to E, tune to F or a few cents up from E. Some techniques suggest tuning the string flat. So instead of tuning to E, tune to D#.
I will be tuning the string flat using the tuner and allowing the string to be tuned 3-4 cents lower than E for the 6th string. The same technique will be used for the rest of the strings once the 6th (E) string has been replaced.
Why do I do this? Once I have tuned the E string to 3 to 4 cents below E, I will then lock the nut. The slight increase in tension the locking nut puts on the string raises the pitch. The two photos below show the E string tuned 3-4 cents below perfect pitch. The second photo shows the string tuned perfectly. All I did was tighten the locking nut. So, it's important to understand how the floating tremolo works. To make it more confusing, the increased tension on the E string has slightly pulled the bridge up, causing the other strings to loosen. This battle of tuning a floating tremolo is a trap for beginners. Tensioning the other strings causes the bridge to move further up, causing the other strings to lose tension.
How do we overcome this?


11. Remove the Foam Block
Remove the foam block before we begin fine-tuning the string using the fine-tuning knobs.
Overcoming the tuning issue, here's the technique I've used that works:
12. Begin Fine Tuning
Tune the string until it's in pitch. Using the method in step 10 to tune the 6th string (E) first. Before we lock the nut we can use the fine-tuning knob to tune the 5th string (A) as well, remembering to lock the nut before fine-tuning and moving to the next string.
Then tune the 1st string (E) and 2nd string (B) making sure I release the locking nut first to avoid string breakage. Tighten the locking nut before fine-tuning.
Lastly, tune the 4th (D) and 3rd (G) strings remembering to unlock the locking nut first, tune and tighten the locking nut before fine-tuning the string. Try to avoid making each string perfectly in tune, rather, take small steps working your way up to the correct pitch. Or working your way down to the correct pitch if the strings have been tuned sharp.
13. Clean Up
Trim the excess string 1cm away from the machine head for a tidy, professional look. Be careful not to accidentally cut the guitar string. Now you can repeat the process again for the next string.
Congratulations! You now know how to change your strings like a professional!