
Author: Allan-Kumpulainen
Much like changing a guitar string, changing your drum heads will liven up the sound of your drums making them come alive again. Where guitar strings should be changed every 2 – 4 weeks (or every show for most professional players), drum heads need only be changed 2 – 4 times a year, depending on how much you play. Generally speaking, your snare drum cops the most punishment, so it should be changed more often!
Here is a very simple guide to replacing your drum head and tuning it up ready to play:
You will need:
Step 1. Loosen all tension rods in a star pattern (one directly across from the last one you loosened) only half a turn at a time and continue in this star pattern until the head is loose. It’s important not to loosen all the tension rods on one side of the drum at once, because it might warp the rim.
Step 2. Hand-loosen and remove the tension rods, as well as any washers and adapter claws. Place them in a sandwich bag or tray and put them aside. It's a good idea to return the ring hoop to its old position, so you may want to mark a point of alignment on both the hoop and the side of the drum before you remove it, using your sticky note or marker pen.
Step 3. Remove the ring hoop that holds down the drum head, then take off the old drum head.
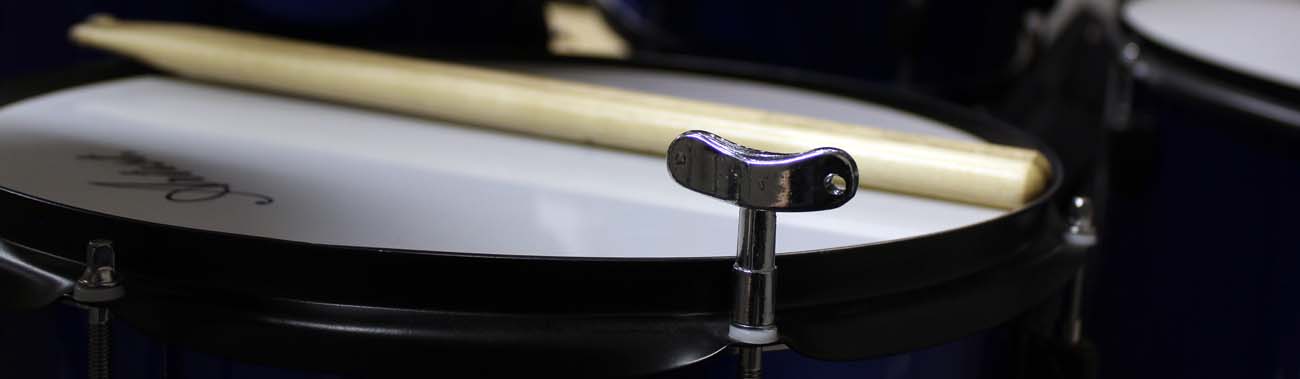
Step 4. Put a light coating of silicone spray or grease on your tension rods to help prevent rust and make tuning easier.
Step 5. Put on the new drum head, and return the ring hoop and hardware to their old positions.
Step 6. Hand-tighten all the screws using the same pattern as before, then follow the pattern with the drum key until you feel a good, strong resistance at each point.
Step 7. Wait at least 15 minutes after you tighten the drum head (the longer the better). This will allow the stretched out drum head get settled on the rim.
Step 8. After 15 minutes or so, de tune the head again so that the tension rods are finger tight. Then follow the star pattern using the drum key to tighten the drum in quarter-turn increments.
Step 9. Each time you complete a full cycle of tuning (You’ve tightened each tension rod), hit the drum with a stick. Repeat this process until the drum is roughly at the pitch you want. A loose head will give you a deeper rock sound.
Step 10. Tap gently and evenly around the outer edge of the drum head next to each tension rod with a stick to see if the pitch is even at each rod. If it's not, make small adjustments until it is. And you're done!
Every drummer you speak to will have their own opinion and technique to tuning and changing a drum head, this is because there are so many variables involved. Firstly, you need to have all the tension rods on the top head tuned to a relative pitch, then the pitch of the top head is tuned relative to the bottom head. Then you have different types of wood, hoops and head material that will all affect the sound and tuning method. As you can see, it’s easy to get lost in advice!
Stay tuned for some more advanced tuning tips. As you could imagine, this is a whole new can of worms!
Now that you know how, you can pick up a great value drum head pack here.
Thanks for reading our report, to give you even more content check our pages below:
